 Flooring Cost Calculator
Introduction
Measuring a room for new flooring is one of the first and most important steps in planning a flooring replacement or installation project. Accurate measurements help you estimate material quantities, create a realistic project budget, and reduce the risk of ordering too much—or too little—flooring.
For a simple rectangular room, calculating the required square footage is relatively straightforward. However, many homes include closets, hallways, alcoves, bay windows, kitchen islands, angled walls, and other features that can make measurements more complicated.
You also need to account for flooring waste. The exact square footage of your rooms is usually not the same as the amount of flooring you need to purchase. Additional material is typically required for cuts, damaged pieces, installation patterns, and future repairs.
Fortunately, measuring your home for new flooring does not have to be difficult. By dividing complicated spaces into simple sections and measuring each area separately, most homeowners can develop a useful estimate before requesting contractor quotes or purchasing materials.
This guide explains how to measure a room for flooring, calculate square footage, handle irregular layouts, account for closets and stairs, and determine approximately how much flooring you may need for your project.
Quick Answer
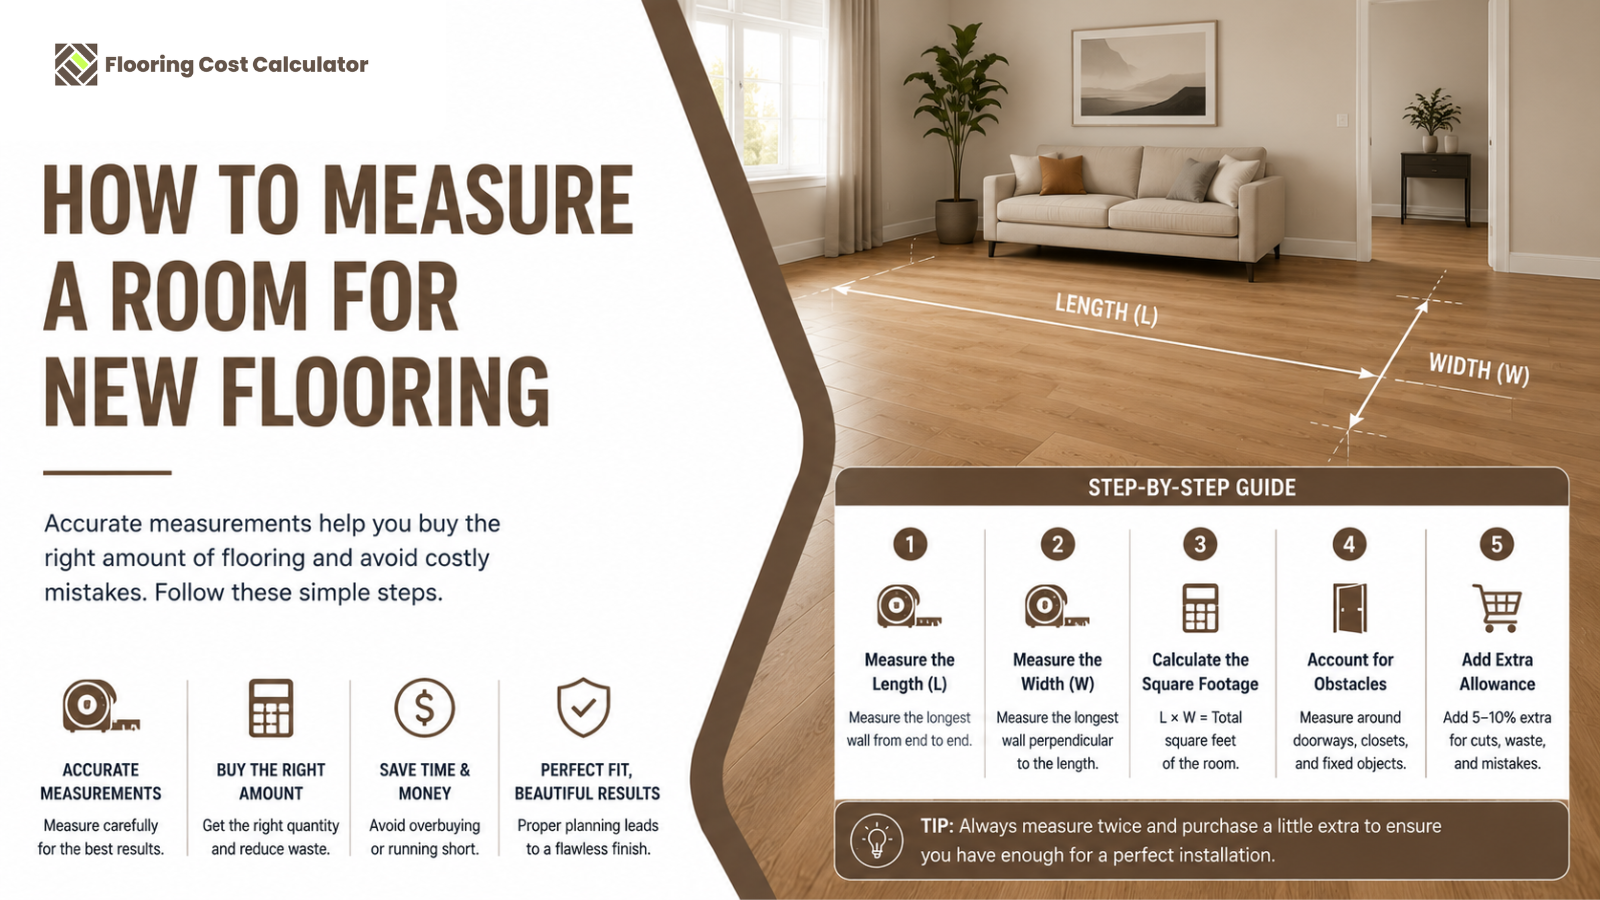
To measure a room for new flooring:
- Measure the room's length in feet.
- Measure the room's width in feet.
- Multiply length by width to calculate square footage.
- Measure closets, alcoves, and additional areas separately.
- Add all areas together.
- Calculate an appropriate allowance for cuts and waste.
- Divide the total required square footage by the coverage per flooring carton.
- Round up to the next full box.
For example, a room measuring 12 feet by 15 feet contains:
12 × 15 = 180 square feet
If you plan for 10% additional material:
180 × 1.10 = 198 square feet
You would therefore need to purchase enough flooring to cover at least 198 square feet, subject to the flooring manufacturer's packaging and your installer's recommendations.
Why Accurate Flooring Measurements Matter
Accurate measurements affect nearly every part of your flooring project.
They help you estimate:
- Flooring material requirements
- Material costs
- Installation labor
- Underlayment requirements
- Removal costs
- Disposal costs
- Overall project budget
If you underestimate the area, you may run out of flooring during installation.
This can result in:
- Project delays
- Additional delivery charges
- Installer scheduling problems
- Difficulty finding matching material
- Differences between manufacturing batches
Overestimating by too much can also be expensive, particularly when purchasing premium hardwood, tile, or other high-cost materials.
The goal is to measure the actual installation area accurately and then intentionally add the appropriate amount of extra material.
Tools You'll Need
You do not need complicated equipment to measure most rooms.
Useful tools include:
- Tape measure
- Laser measuring device
- Pencil
- Paper
- Calculator
- Smartphone or tablet
A tape measure is usually sufficient for smaller rooms.
A laser measuring device can make measuring larger rooms and open floor plans faster, but measurements should still be checked for accuracy.
It can also be helpful to draw a simple floor plan and write each measurement directly onto the sketch.
Step 1: Draw a Simple Floor Plan
Before measuring, create a basic sketch of the room.
The drawing does not need to be perfectly scaled.
Include major features such as:
- Walls
- Doors
- Closets
- Alcoves
- Bay windows
- Cabinets
- Islands
- Columns
- Stairs
The goal is simply to create a visual reference where you can record measurements.
For complicated projects involving several rooms, draw each room separately.
Label each area clearly, such as:
- Living Room
- Kitchen
- Bedroom 1
- Bedroom 2
- Hallway
- Closet
Organizing your measurements from the beginning makes calculating the total project area much easier.
Step 2: Measure the Length
Measure from one wall to the opposite wall.
Whenever possible, measure at floor level because this is the area the flooring will actually cover.
Record the measurement carefully.
If the room measures in feet and inches, write down the complete measurement rather than rounding down.
For example:
14 feet 8 inches
Rounding down to 14 feet would underestimate the room.
When calculating flooring quantities, it is generally better to slightly overestimate than underestimate.
Step 3: Measure the Width
Next, measure the width of the room from wall to wall.
Again, record the full measurement.
For example:
12 feet 4 inches
Once you have both dimensions, you can calculate the room's approximate square footage.
Step 4: Calculate the Square Footage
For a rectangular or square room, use the basic formula:
Length × Width = Square Feet
For example, a room measuring:
15 feet × 12 feet
contains:
180 square feet
Another room measuring:
20 feet × 18 feet
contains:
360 square feet
This calculation gives you the actual floor area before adding extra material for cuts and waste.
How to Handle Feet and Inches
Many rooms do not measure in exact whole feet.
For example, your room might measure:
12 feet 6 inches × 14 feet 3 inches
One approach is to convert inches into decimals.
Because there are 12 inches in one foot:
- 3 inches = 0.25 feet
- 6 inches = 0.5 feet
- 9 inches = 0.75 feet
So:
12 feet 6 inches = 12.5 feet
and:
14 feet 3 inches = 14.25 feet
Calculate:
12.5 × 14.25 = 178.125 square feet
For planning purposes, you might round this measurement up to approximately:
179 square feet
You would then add your appropriate waste allowance.
Don't Round Measurements Down
One of the easiest mistakes to make is rounding dimensions down too early.
Suppose a room measures:
11 feet 10 inches × 13 feet 11 inches
If you round these dimensions down to:
11 × 13
you calculate only:
143 square feet
However, the actual room is considerably larger.
Rounding down repeatedly across multiple rooms can create a significant material shortage.
Measure accurately and round the final flooring requirement up when necessary.
How to Measure an L-Shaped Room
An L-shaped room may look complicated, but it can be measured by dividing it into rectangles.
Imagine the room can be divided into:
Section A:
12 feet × 15 feet = 180 square feet
Section B:
6 feet × 8 feet = 48 square feet
Add the sections:
180 + 48 = 228 square feet
The total floor area is:
228 square feet
You can use the same method for many irregular rooms.
Instead of trying to calculate the entire shape at once, divide it into simple rectangles or squares.
How to Measure an Irregular Room
Rooms with multiple corners, extensions, or unusual layouts can be divided into smaller sections.
For example:
- Main room
- Entry section
- Alcove
- Bay window
- Closet
Measure each section separately.
Then calculate:
Section A + Section B + Section C + Section D = Total Square Footage
This approach may take slightly longer, but it reduces measurement errors.
If a room contains highly unusual angles or curves, professional measurement may be appropriate, particularly when purchasing expensive flooring.
How to Measure Closets
If you plan to install flooring inside a closet, include it in your total measurements.
Measure:
Closet Length × Closet Width = Closet Square Footage
For example:
6 feet × 3 feet = 18 square feet
Add this amount to the room's total.
Do not assume that a small closet is insignificant.
A home with several closets can add a meaningful amount of flooring to the overall project.
Remember to include:
- Reach-in closets
- Walk-in closets
- Linen closets
- Hall closets
- Pantry areas
Only include areas where the new flooring will actually be installed.
How to Measure a Hallway
Hallways are usually straightforward to measure.
Use:
Length × Width = Square Feet
For example:
18 feet × 4 feet = 72 square feet
If the hallway changes width, divide it into separate sections.
For example:
Section A:
12 × 4 = 48 square feet
Section B:
6 × 6 = 36 square feet
Total:
48 + 36 = 84 square feet
Hallways can also affect flooring waste because narrow spaces may require additional plank or tile cuts.
How to Measure an Open Floor Plan
Open-concept homes often combine:
- Living rooms
- Dining rooms
- Kitchens
- Entryways
- Hallways
Instead of trying to measure the entire space as one complicated shape, divide it into logical rectangles.
For example:
Living Area: 300 sq ft
Dining Area: 150 sq ft
Kitchen: 180 sq ft
Entryway: 50 sq ft
Total:
300 + 150 + 180 + 50 = 680 square feet
This method makes it easier to check your calculations and identify errors.
How to Measure Around Kitchen Cabinets
If flooring will not be installed underneath permanent cabinets, you may be able to exclude those areas from your measurement.
However, the correct approach depends on:
- Flooring material
- Installation method
- Cabinet layout
- Renovation sequence
Some flooring systems should not be installed beneath fixed cabinetry, while other installations may extend underneath certain fixtures.
If you are unsure, ask your flooring installer before subtracting cabinet areas.
Removing too much square footage from your calculation could leave you short on material.
How to Measure Around a Kitchen Island
Whether you subtract a kitchen island depends on whether flooring will be installed beneath it.
If the island is permanent and the flooring will only run around it, measure the island footprint.
For example:
Island: 4 feet × 8 feet = 32 square feet
If your kitchen measures:
240 square feet
and the island footprint is:
32 square feet
the exposed flooring area may be approximately:
240 - 32 = 208 square feet
However, installers still need material for cuts around the island, so the actual ordering quantity should include an appropriate waste allowance.
Should You Measure Under Appliances?
This depends on the appliance and flooring installation.
Flooring is commonly installed beneath some freestanding appliances, which may include:
- Refrigerators
- Ranges
- Dishwashers in some installations
- Washing machines
- Dryers
Installation practices vary by flooring type and room design.
If you are uncertain, include the area in your initial measurements and discuss the final layout with your installer.
It is generally easier to adjust your material estimate before ordering than to discover you need additional flooring during installation.
How to Measure Bathrooms
Bathrooms can contain many fixed features, including:
- Vanities
- Toilets
- Bathtubs
- Showers
Measure the overall room dimensions first.
Then determine which areas will actually receive flooring.
The installation method and bathroom layout determine whether certain areas should be subtracted.
Because bathrooms often require numerous cuts around fixtures and walls, the waste percentage may differ from a simple rectangular bedroom.
How to Measure Stairs for Flooring
Stairs require a different approach from standard rooms.
Depending on the project, you may need flooring for:
- Treads
- Risers
- Landings
- Stair nosing
Each tread and riser should generally be measured individually or verified for consistent dimensions.
For a tread, measure:
Width × Depth
For a riser, measure:
Width × Height
However, calculating flooring for stairs based only on square footage may not accurately reflect material requirements.
Specific plank sizes, nosing pieces, carpet dimensions, or custom cuts can significantly affect the quantity needed.
For this reason, professional measurement is recommended for many stair installations.
How to Measure Multiple Rooms
If you are replacing flooring throughout several rooms, calculate each room separately.
For example:
| Area | Square Footage |
|---|---|
| Living Room | 320 sq ft |
| Dining Room | 160 sq ft |
| Kitchen | 190 sq ft |
| Hallway | 75 sq ft |
| Bedroom 1 | 180 sq ft |
| Bedroom 2 | 165 sq ft |
| Closets | 45 sq ft |
| Total | 1,135 sq ft |
Once you know the total installation area, add the appropriate waste allowance.
Keeping individual room measurements can also be helpful when comparing contractor estimates.
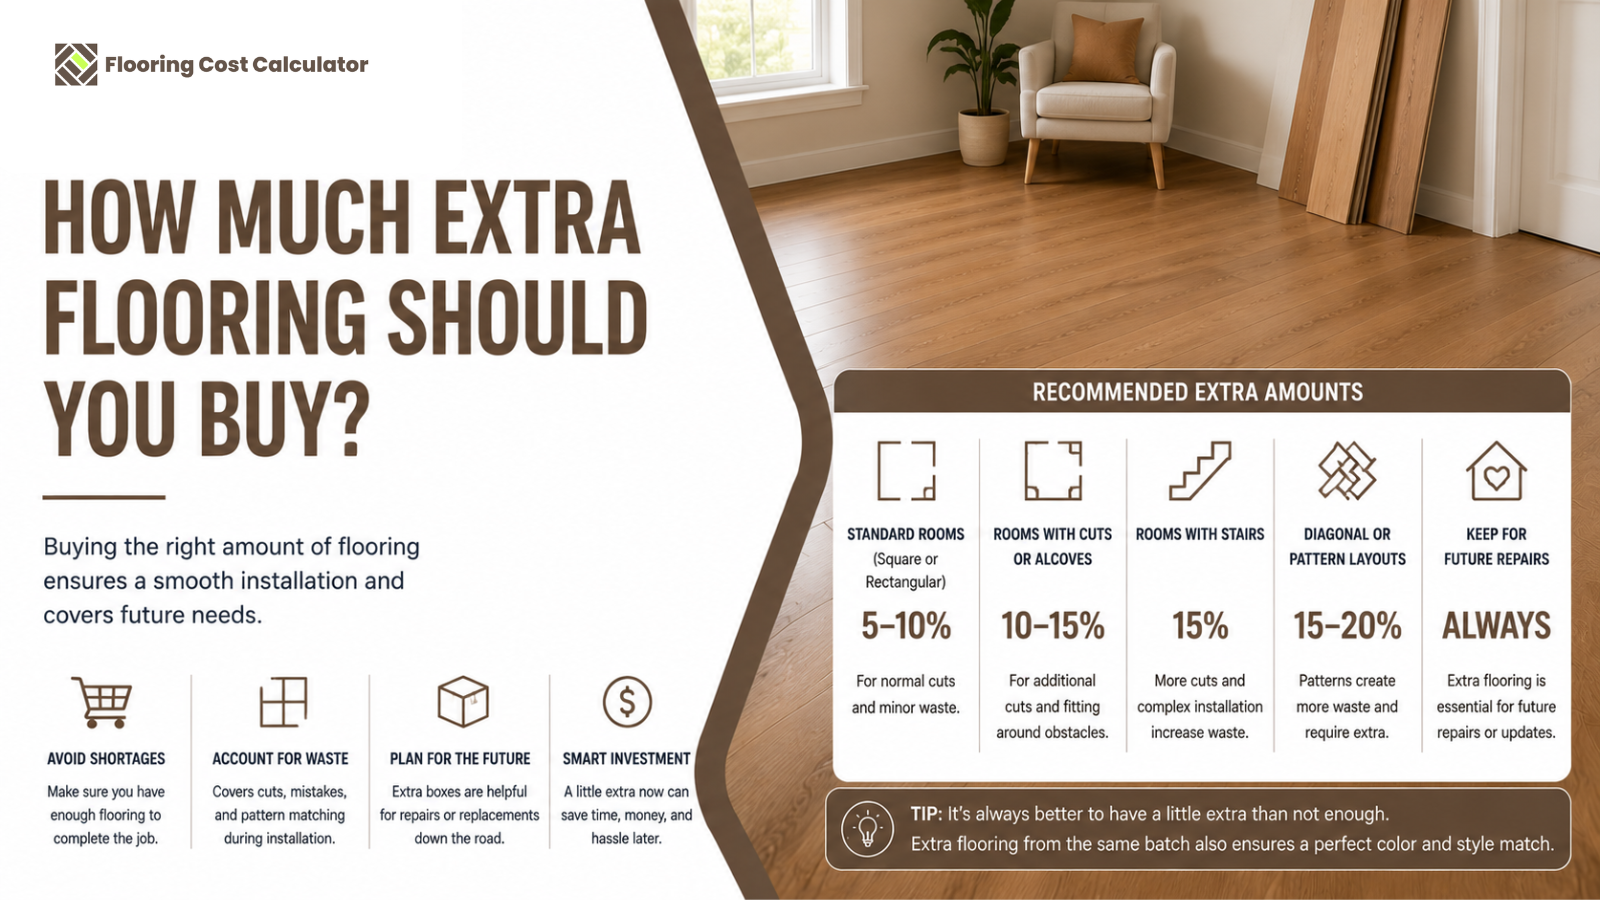
Add Extra Flooring for Cuts and Waste
The exact measured area is generally not the same as the amount of flooring you should purchase.
Additional material may be required for:
- Cutting
- Damaged pieces
- Pattern alignment
- Board staggering
- Irregular walls
- Installation mistakes
- Future repairs
As a general starting point:
| Project Type | General Extra Material Guideline |
|---|---|
| Simple rectangular room | 5%–10% |
| Standard plank installation | 7%–10% |
| Irregular room | 10%–15% |
| Multiple connected rooms | 10%–15% |
| Diagonal installation | 10%–15% |
| Complex tile patterns | 15%–20%+ |
These are general planning guidelines rather than universal requirements.
Your installer or flooring supplier can recommend the appropriate amount for your specific product and layout.
Example: Measuring a Room and Adding Waste
Imagine a room measures:
16 feet × 14 feet
Calculate the floor area:
16 × 14 = 224 square feet
You decide to add 10% for waste.
Calculate:
224 × 0.10 = 22.4 square feet
Then:
224 + 22.4 = 246.4 square feet
Your estimated material requirement is approximately:
247 square feet
You would then determine how many boxes of flooring are required.
Calculate How Many Boxes You Need
Most plank and tile flooring products are sold by the carton.
Check the packaging or product specifications to determine how many square feet each box covers.
Suppose you need:
247 square feet
Each box covers:
21.5 square feet
Calculate:
247 ÷ 21.5 = 11.49 boxes
Because you cannot purchase a partial carton, round up.
You would need:
12 boxes
Never round the number of boxes down.
Double-Check Your Measurements
Before ordering flooring, measure the space again.
A second measurement can catch simple mistakes such as:
- Transposed numbers
- Forgotten closets
- Missing alcoves
- Incorrect calculations
- Measurement errors
For larger projects, it can be helpful to have another person independently verify your measurements.
A few minutes spent checking measurements can prevent expensive ordering mistakes.
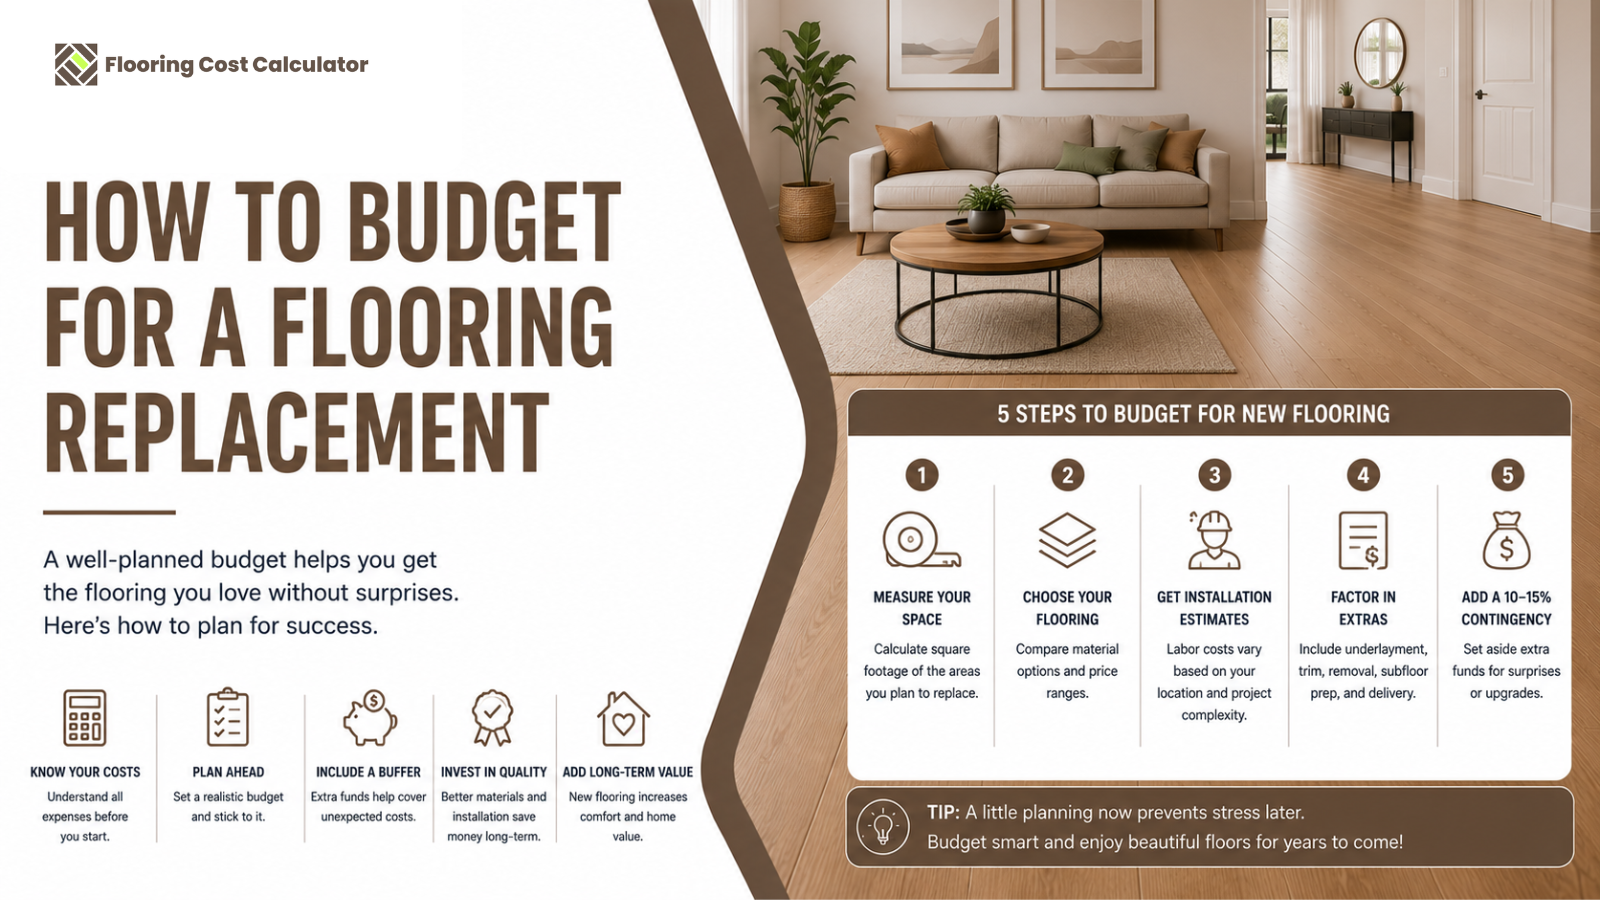
Measure Before Requesting Contractor Estimates
Having an approximate square footage before contacting flooring contractors can help you:
- Estimate your budget.
- Compare flooring materials.
- Understand contractor pricing.
- Identify unusually high or low estimates.
However, your measurements should be treated as preliminary.
Many professional installers will measure the property themselves before providing a final quote or ordering materials.
Their measurement may differ from yours because they account for installation-specific factors.
Why Contractor Measurements May Be Higher
Do not automatically assume an installer made a mistake if their flooring quantity is higher than your measured square footage.
They may be accounting for:
- Waste
- Plank direction
- Pattern alignment
- Doorways
- Closets
- Irregular walls
- Damaged pieces
- Future repair material
Ask the contractor to explain how the required quantity was calculated.
A reputable installer should be able to explain the difference between your home's actual floor area and the amount of flooring that needs to be purchased.
Common Flooring Measurement Mistakes
Several common mistakes can result in inaccurate flooring estimates.
These include:
- Measuring only the main room.
- Forgetting closets.
- Forgetting hallways.
- Rounding measurements down.
- Measuring wall-to-wall inaccurately.
- Forgetting irregular sections.
- Subtracting too much for cabinets or fixtures.
- Failing to account for waste.
- Using the same waste percentage for every installation.
- Forgetting stairs.
- Assuming square footage equals material quantity.
- Rounding the number of cartons down.
Careful measurements and simple calculations can prevent most of these problems.
Keep Your Measurements Organized
For larger flooring projects, create a simple measurement worksheet.
Record:
- Room name
- Length
- Width
- Calculated square footage
- Closet area
- Additional sections
- Total room area
Then calculate the complete project square footage.
Keeping organized records makes it easier to update your estimate if you decide to exclude a room or change the scope of the project.
Consider Keeping Leftover Flooring
If your project produces usable leftover material, consider keeping it.
Extra flooring can be valuable for future repairs caused by:
- Water damage
- Deep scratches
- Cracked tiles
- Pet damage
- Remodeling
Finding an exact match several years later may be difficult if the flooring has been discontinued.
Store leftover flooring according to manufacturer recommendations and keep the product information with it.
When to Use Professional Measurement
DIY measurements are useful for preliminary budgeting, but professional measurement may be worthwhile for:
- Whole-home flooring replacement
- Expensive hardwood
- Complex tile installations
- Herringbone or chevron patterns
- Irregular rooms
- Staircases
- Large open floor plans
- Patterned carpet
Professional installers can account for installation details that basic square-footage calculations may overlook.
If the material is expensive, the cost of measurement errors can easily exceed the value of having the project professionally measured.
Questions to Ask Your Flooring Installer
Before ordering flooring, consider asking:
- What is the total measured installation area?
- What waste percentage do you recommend?
- Why is that percentage appropriate?
- How many cartons should I purchase?
- Are closets included?
- Will flooring be installed under appliances?
- How are cabinets and islands handled?
- Does the installation pattern increase waste?
- Should I keep extra flooring for future repairs?
- Can unopened boxes be returned?
These questions can help you order the correct amount while avoiding unnecessary expenses.
Frequently Asked Questions
How do I calculate the square footage of a room?
Multiply the room's length by its width.
For example:
12 feet × 15 feet = 180 square feet
For irregular rooms, divide the area into smaller rectangles, calculate each section, and add the results.
Should I measure from wall to wall?
Generally, yes.
Measure the complete floor area where flooring will be installed.
Your installer can determine whether specific fixed features should be excluded.
Should I include closets?
Yes, if the new flooring will be installed inside them.
Measure each closet and add its area to the total.
How much extra flooring should I add?
For many projects, approximately 5% to 15% extra is a useful general starting range.
Simple rooms may require less, while irregular spaces and complex installation patterns may require more.
Should I subtract kitchen cabinets?
It depends on the flooring type and installation method.
Ask your installer before subtracting permanent cabinets from your measurements.
How do I measure an L-shaped room?
Divide the room into two or more rectangles.
Calculate each section separately and add the square footage together.
How do I calculate the number of flooring boxes?
Use:
Total Flooring Required ÷ Square Feet Per Box = Number of Boxes
Always round up to the next full carton.
Can I measure my own home for flooring?
Yes.
Homeowner measurements are usually sufficient for preliminary budgeting.
For final material orders, large projects, irregular layouts, stairs, or expensive materials, professional verification is recommended.
Why do I need more flooring than my room's square footage?
Additional flooring is required for cuts, waste, pattern alignment, damaged pieces, and other installation requirements.
The amount depends on your flooring material and room layout.
Should I buy extra flooring for future repairs?
Keeping several planks, tiles, or an unopened carton can be useful.
Matching flooring may become difficult to find if the product is discontinued or changed.
Final Verdict
Measuring a room for new flooring begins with a simple calculation:
Length × Width = Square Feet
For rectangular rooms, this provides the basic floor area. More complicated spaces can usually be divided into smaller rectangles and measured separately.
The most important step is ensuring that every area receiving new flooring is included.
Remember to account for:
- Closets
- Hallways
- Alcoves
- Connected rooms
- Irregular sections
- Stairs when applicable
Once you calculate the actual installation area, add an appropriate amount of extra material for cuts and waste.
The amount of flooring you purchase will usually be higher than the exact square footage of your rooms.
Careful measurements provide a reliable starting point for estimating your project's material and installation costs.
Final Thoughts
Accurate measurements are the foundation of a well-planned flooring project. Taking the time to measure each room carefully can help you develop a more realistic budget, compare flooring options, and reduce the risk of ordering mistakes.
Start by drawing a simple floor plan, measure each section individually, and keep your calculations organized. Include closets and other areas that will receive flooring, and avoid rounding measurements down.
For complicated layouts, expensive materials, stairs, or whole-home installations, consider having your measurements verified by a flooring professional before placing the final material order.
Before requesting contractor estimates, use the Flooring Cost Calculator on the homepage to estimate your project's cost based on your measured square footage, selected flooring material, and state. An accurate measurement combined with a personalized cost estimate can help you establish a realistic budget, compare material options, and approach contractor quotes with greater confidence.